
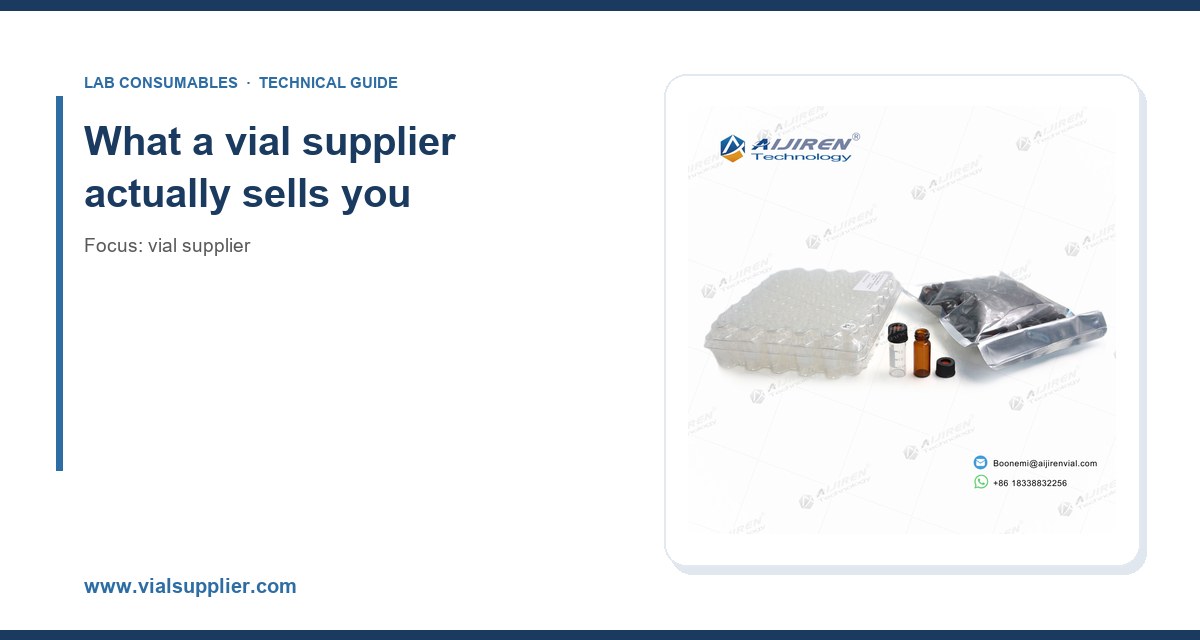
I still remember the first container of 2 mL autosampler vials I bought on a purchase order written by someone who had never opened a vial. The glass was fine. The caps were not. The septa were 1.5 mm silicone/PTFE, the wrong hardness for our crimper, and we lost about 400 injections to coring before anyone thought to look at the seal. That mistake cost us less in dollars than in a re-run of a validated method on a Friday afternoon. Since then I have bought vials by the pallet, audited three suppliers in person, and negotiated MOQs down by 60 percent. This is what I wish someone had handed me at the start.
A vial is not a single product. It is a system of four parts that must work together: the glass body, the closure (screw cap or crimp seal), the septum, and the dimensional tolerance that ties them to your autosampler. Most procurement disasters come from buying these as separate line items from different suppliers and assuming they will fit. They often do not. A 12 x 32 mm vial from one supplier can have a neck OD that varies by 0.2 mm from another, and that is enough to jam a 9 mm screw cap or fail to seat in a tray.
When you evaluate a vial supplier, you are evaluating four things: dimensional consistency, glass chemistry, closure compatibility, and the paperwork behind the lot. Price is the fifth thing, and it should be the last thing you weigh, not the first.
Glass: USP Type I vs Type III
Almost all analytical vials for HPLC and GC are made from USP Type I borosilicate glass (expansion coefficient around 3.3 x 10^-6 per degree C). Type I is what you want for pH-sensitive analytes, for anything stored below pH 6 or above pH 8, and for trace metals work. Type III soda-lime glass is cheaper and fine for short-hold neutral samples, but it leaches sodium and calcium and will skew your results if you are running ICP-MS or low-level cation analysis.
Ask for the glass type in writing on the certificate of analysis. If the supplier cannot tell you whether their 2 mL vial is Type I or Type III, that is your first red flag. A real supplier knows this because their customers ask every week.
Septa: the part everyone underestimates
The septum is where most of your money leaks out. A 9 mm silicone/PTFE septum rated for 100 punctures at 2.0 mm thickness is not the same as a 1.5 mm septum rated for 50. Thinner septa core faster. Harder silicone (higher durometer, typically 45 to 55 Shore A) resists coring but seals less aggressively on low-pressure autosamplers. Laminated PTFE-faced septa are the default for HPLC because the PTFE face is inert to almost everything and the silicone behind it provides the reseal.
For GC, you often want a higher-temperature septum. Standard silicone/PTFE tops out around 200 degrees C at the injector. If you run a 250 degree C inlet, specify a septum rated for that, or you will get bleed peaks that look like column contamination. I have watched a lab chase a phantom baseline rise for two weeks before someone swapped the septum lot.
If you are filtering samples before injection, the same material logic applies to your filter membranes. A PTFE membrane filter is the right choice for aggressive solvents and for GC sample prep where you cannot tolerate aqueous filter extractables. Match the membrane to the vial, not the other way around.
Standard formats and the numbers that matter
Most of the market runs on a handful of formats. Know these cold before you write a spec.
- 2 mL autosampler vial: 12 x 32 mm body, 11 mm crimp or 9 mm screw thread, 6 mm or 8 mm opening. The workhorse for HPLC autosamplers.
- 4 mL vial: 15 x 45 mm, 13 mm or 13-425 screw thread. Common on older autosamplers and for larger injection volumes.
- 10 mL and 20 mL headspace vial: 22.5 x 46 mm and 23 x 75 mm, 20 mm crimp. Used with headspace GC.
- 1.5 mL and 2 mL microcentrifuge-style vials: often confused with autosampler vials but usually not rated for the same autosampler tray geometry.
The dimensional tolerance you should demand on a 12 x 32 mm vial is +/- 0.2 mm on body OD and +/- 0.15 mm on height. Anything looser and you will get tray jams on high-throughput systems. Ask for the dimensional report from the last three lots. A supplier who cannot produce it is guessing.
Closure and thread standards
Screw caps follow a nominal thread designation. The 9 mm short-thread is the modern standard for 2 mL vials; the older 8-425 and 10-425 formats still appear in legacy methods. Crimp seals follow the 11 mm standard for 2 mL vials and 20 mm for headspace. The Glass Packaging Institute (GPI) publishes finish dimensions for these; the 13-425 and 20-400 finishes are the ones you will see cited most often in method documentation.
If your method references a specific finish, buy to that finish and verify it. A 9 mm cap on an 8-425 neck will thread on and then leak. I have seen that exact failure on a validated EPA method and it took a full day to diagnose.
How to evaluate a vial supplier: the checklist
This is the part most procurement teams skip. They send an RFQ, compare three prices, and pick the middle one. That is not evaluation, that is a coin flip with paperwork. Here is the checklist I actually use, with the numbers I expect to see.
1. Dimensional and functional QC
- Dimensional report: body OD, height, neck ID, thread pitch, all with tolerance bands. Expect +/- 0.2 mm on OD, +/- 0.15 mm on height.
- Seal integrity test: dye penetration or pressure decay on a sample of at least 30 units per lot. Zero failures acceptable.
- Septum puncture count: the supplier should state a rated puncture count and the test method. 50 to 100 punctures is normal for a 1.5 mm silicone/PTFE septum at 2 bar.
- Extractable screening: UV absorbance at 210 and 254 nm for aqueous and organic extracts. Expect less than 0.05 AU above blank.
2. Glass chemistry documentation
You want a certificate of analysis that names the glass type (USP Type I), the hydrolytic resistance class (ISO 719 / ISO 720), and the lot number. If the supplier sources from multiple glass plants, ask which plant made which lot. I have seen a single “supplier” ship vials from three different furnaces in one shipment. The chemistry was fine but the dimensional spread was not.
3. Closure and septum traceability
The septum is the highest-risk component. Ask for the durometer (Shore A), the thickness in mm, the PTFE facing thickness (typically 0.1 to 0.2 mm), and the temperature rating in degrees C. Ask for the lot number on the septum bag, not just the cap bag. If the supplier cannot separate septum lots from cap lots, you cannot trace a coring event back to a batch.
4. Autosampler compatibility proof
Ask for a compatibility matrix that names the autosampler models the vial is validated on. Agilent, Waters, Shimadzu, and Thermo all have slightly different tray geometries. A vial that works on an Agilent 1260 may sit 0.3 mm too high on a Waters Alliance. This is not a theoretical concern; it is a real cause of needle crashes. For reference on how the instrument makers spec their own consumables, the Agilent chromatography consumables pages and the Thermo Fisher chromatography and sample handling catalog are useful benchmarks for what “compatible” actually means in practice.
5. Manufacturing and quality system
Ask for the ISO 9001 certificate and the date of the last surveillance audit. If the supplier is a distributor rather than a manufacturer, ask who the manufacturer is and whether you can audit them. A distributor who will not name their factory is a reseller, and resellers cannot control dimensional drift.
Pricing: what actually drives the number
Vial pricing is not arbitrary, but it is opaque. The unit price you see is a function of glass cost, closure cost, packaging labor, freight, and the supplier’s margin stack. Understanding the stack lets you negotiate the right line item.
The cost breakdown, roughly
- Glass body: 30 to 45 percent of unit cost for a 2 mL clear vial. Amber glass adds 10 to 15 percent.
- Closure and septum: 25 to 40 percent. This is where suppliers cut corners to hit a price.
- Packaging: 10 to 20 percent. Vials ship in trays or bags; the tray is what protects the dimensional tolerance in transit.
- Freight and duties: 5 to 15 percent, highly variable.
- Supplier margin: 10 to 25 percent depending on volume and relationship.
When a quote comes in 30 percent below the market, the discount is almost always in the closure or the packaging. Either the septum is thinner, the durometer is wrong, or the vials are bagged loose instead of trayed. Loose-bagged vials arrive with dimensional drift and you pay for it in autosampler downtime.
Real price ranges to anchor your negotiation
For a standard 2 mL clear glass 12 x 32 mm vial with a 9 mm screw cap and silicone/PTFE septum, in the U.S. market at 2024 volumes, expect roughly $0.08 to $0.14 per unit at the 10,000-unit tier and $0.05 to $0.09 at the 100,000-unit tier. Amber glass adds a few cents. Certified vials (with a CoA per lot and dimensional report) add 15 to 25 percent. If you are quoted below $0.04 at 10,000 units, ask what changed in the septum.
For 20 mL headspace vials with 20 mm crimp seals, expect $0.20 to $0.40 per unit at moderate volume, again with the closure being the swing factor.
MOQ: how to negotiate without losing your shirt
Minimum order quantities exist for real reasons. Glass molds, tray packaging, and lot-based QC all have fixed costs. But MOQs are also a negotiation lever, and most buyers accept the first number. Do not.
What drives a supplier’s MOQ
- Mold setup: a new vial size requires a mold change, typically a few hours of downtime. That is the real cost behind a 50,000-unit MOQ on a non-standard size.
- Lot-based QC: every lot needs a dimensional and seal test. Small lots cost the same to QC as large ones, so suppliers push volume.
- Packaging runs: trayed packaging is set up per run. A 5,000-unit run is inefficient; a 50,000-unit run is not.
Negotiation tactics that work
First, standardize on a catalog size. If you can move your method to a 12 x 32 mm 9 mm screw vial, you are buying a stock item and the MOQ drops to 1,000 to 5,000 units at most suppliers. Custom sizes and colors carry 10x to 50x MOQs.
Second, commit to an annual volume with quarterly releases. Suppliers will accept a 5,000-unit MOQ if you sign a 40,000-unit annual commitment with scheduled releases. Put the release schedule in the contract and hold them to it.
Third, split the closure from the glass. Buy glass in bulk and closures in smaller lots if your septum consumption is lower than your vial consumption. This is common in labs that reuse vials after cleaning (which I do not recommend for regulated work, but it happens).
Fourth, ask for the MOQ in trays, not units. A tray is typically 100 vials. A 50-tray MOQ is 5,000 units and sounds smaller than “5,000 units” even though it is the same thing. Suppliers respond to framing.
Operational precautions: what goes wrong after delivery
Most vial failures happen in the lab, not at the factory. Here is what I watch for.
Crimping torque and seal geometry
Crimp seals need the right crimper setting. Too loose and the seal leaks under vacuum; too tight and you crack the neck or deform the septum. For an 11 mm aluminum crimp on a 2 mL vial, the crimper should be set so the seal skirt is fully rolled but the vial neck is not visibly stressed. There is no universal torque value in newton-meters because crimpers are mechanical, not torque-driven, but the functional test is: invert the sealed vial and apply 2 bar of head pressure for 30 seconds. No leak, no deformation.
Screw caps are different. Hand-tight plus a quarter turn is the practical standard. Over-tightening compresses the septum and causes coring on the first puncture. If you use an automated cap tightener, set it to the low end of the cap manufacturer’s range and verify with a torque tester. Typical values for 9 mm screw caps are 0.4 to 0.6 N·m; anything above 0.8 N·m starts to deform the septum.
Septum coring and needle gauge
Coring happens when the needle gauge is too large for the septum or the needle is dull. A 22-gauge needle (0.72 mm OD) is fine on a 1.5 mm silicone/PTFE septum. A 16-gauge needle will core it in under 20 punctures. If you see septum fragments in your chromatogram as late-eluting ghost peaks, check the needle before you blame the column.
Storage and light sensitivity
Amber vials are not opaque. They reduce transmission but do not eliminate it. For light-sensitive analytes, wrap the autosampler tray or use amber vials plus a dark cover. I have seen a photodegradation peak appear at 4 hours in a clear vial and at 11 hours in an amber vial, which tells you amber helps but is not a solution.
Cleaning and reuse
Do not reuse vials for regulated methods. The glass surface changes after the first wash, and the septum loses reseal performance after the first puncture. For internal R&D work, a wash with laboratory-grade detergent followed by a DI water rinse and a 200 degree C bake is acceptable, but document it and do not let it drift into a validated method.
Troubleshooting checklist
When a vial-related problem shows up in the data, work through this list in order. It is faster than guessing.
- Ghost peaks or carryover: check septum coring first, then vial cleanliness, then the HPLC filter in your mobile phase line. A clogged filter looks like vial contamination.
- Injection volume variability (RSD above 1 percent): check cap torque, then septum reseal, then vial fill height. Fill height below 50 percent of vial volume causes autosampler errors on some systems.
- Baseline drift on GC: check septum temperature rating against inlet temperature. A 200 degree C septum in a 250 degree C inlet bleeds continuously.
- Leak during headspace analysis: check crimp seal geometry and septum durometer. A soft septum (below 45 Shore A) will not hold 1.5 bar head pressure.
- Tray jams: measure body OD on 10 random vials with calipers. If any exceed 12.2 mm, the lot is out of spec.
- Trace metal contamination: confirm glass type is USP Type I, not Type III. Check the lot CoA.
For method-level troubleshooting, the U.S. EPA SW-846 test methods and the Restek technical resources are the two references I reach for most often. Both document vial and septum requirements alongside the analytical method, which is exactly the context procurement teams usually lack.
Comparison: distributor vs manufacturer vs marketplace
There are three ways to buy vials, and they are not equivalent. Here is how I rank them for a working lab.
- Manufacturer direct: best dimensional control, real CoA per lot, negotiable MOQ on annual commitment. Downside is lead time (often 4 to 8 weeks) and a minimum order that is too high for small labs.
- Authorized distributor: good for small volumes and fast delivery, carries the manufacturer’s CoA, but marks up 15 to 30 percent and cannot always control lot selection. Best for labs that need 1,000 to 5,000 units at a time.
- Marketplace or unbranded reseller: cheapest headline price, worst traceability. I have seen vials arrive with no lot number, mixed glass types in one box, and septa that failed the durometer check. Avoid for regulated work. Acceptable only for non-critical internal screening.
My default recommendation for a lab running validated methods is manufacturer direct with an annual commitment, backed by an authorized distributor for spot needs. That combination gives you dimensional control on the bulk and speed on the exceptions. A specialist vial supplier who publishes dimensional reports and septum specs is worth a 10 percent premium over a reseller who will not.
Decision checklist before you sign
Run this before you issue a PO. If any line is blank, you are not ready.
- Glass type confirmed in writing (USP Type I expected).
- Dimensional report from last three lots, with tolerance bands.
- Septum durometer, thickness, PTFE facing, and temperature rating documented.
- Puncture count rating stated with test method.
- Closure finish (9 mm, 11 mm, 20 mm) matches your method and autosampler.
- Autosampler compatibility matrix reviewed.
- ISO 9001 certificate current.
- Lot traceability from glass to septum to cap.
- MOQ and annual commitment in writing, with release schedule.
- Unit price benchmarked against the $0.08 to $0.14 range for 2 mL at 10k volume.
- Sample lot run through your own method before full acceptance.
That last line is the one people skip. Buy a sample lot, run 50 injections of your own matrix, and check RSD and ghost peaks. It takes an afternoon and it will catch the coring problem before it reaches a validated run. The same discipline applies to your broader consumables chain; if you are also sourcing columns and sample prep, the lab chromatography resources on method compatibility are a good cross-check.
Takeaway
Vial procurement is a specification exercise, not a price exercise. The unit price of a 2 mL vial is 8 to 14 cents at reasonable volume, and the difference between a good supplier and a cheap one is a few cents per unit against a re-run that costs hundreds. Buy to a written spec (USP Type I glass, +/- 0.2 mm dimensional tolerance, documented septum durometer and temperature rating, 50 to 100 puncture count), demand lot traceability, negotiate MOQ against an annual commitment rather than a single order, and run a sample lot through your own method before you accept. Do that and the vial stops being a variable in your data.
References & further reading
Related resources from our lab consumables network:
- Vial Supplier at vialsupplier.com
- Lab Chromatography at labchromatography.com
- Hplc Filter at hplcfilters.com
- Ptfe Membrane Filter at ptfemembranefilter.com
External references and standards: